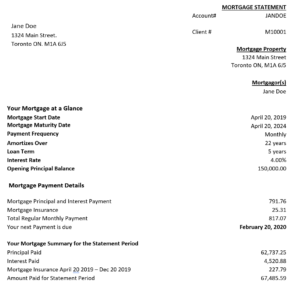
Consider the following mortgage statement as an example for initial data entry.
Given the above example, we will take a look at how we can setup the borrower, and loan. Then bring in a opening balance of $87,262.75 as of January 20th, 2020.
Borrower Setup #
First, we will setup the borrower. If the borrower for the loan you are trying to setup already has another loan, you may reused the same Borrower ID and skip to loan setup instead.
Go to Setup from the Main Menu.
Go to Borrowers from the Setup Menu.
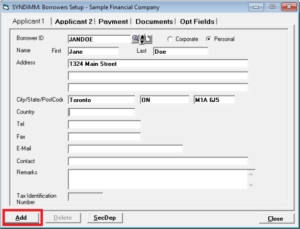
Enter the borrower’s account number as the Borrower ID. The Borrower ID is used to uniquely identify each borrower. If the borrower already exists, the borrower information will be displayed, and the save button will be greyed out until a field is changed. If not, you may use it to enter a new borrower. Fill out the remaining information about the borrower, then click Add.
Loan Setup #
Next, we will setup the loan.
Go to Loans & Properties from the Main Menu.
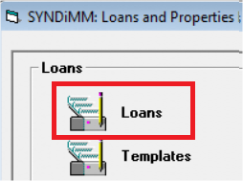
Go to Loans from the Loans and Properties Menu.
Enter the client number as the Loan ID. The Loan ID is used to uniquely identify each loan. If a loan already exists the loan information will be displayed, and the save button will be greyed out. If not, you may enter it as a new loan. Press tab on the keyboard and fill in the loan information like below. Then click Add.
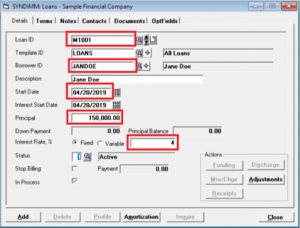
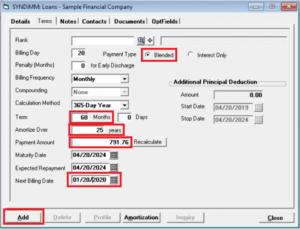
IMPORTANT NOTE: Normally the next billing date is left as default. However, since we want to enter the loan as a balance as of January 20th, 2020. Change the next billing date to the balance date.
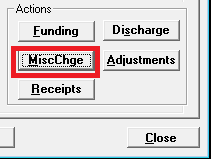
The loan is now saved. Next, we will setup the mortgage insurance. You may setup any other miscellaneous charges applicable to this loan. Click on the MiscChg button from the actions area located at the bottom right corner of the loans screen.
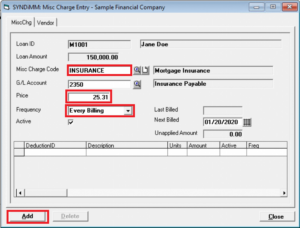
Enter the Misc Charge Code for the miscellaneous charge you wish to charge the borrower on monthly basis. Set the price and change the Frequency to Every Billing. Then click Add.Any charge code that had been setup already will be displayed in the data grid at the bottom of the screen.
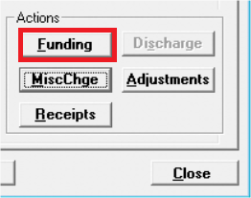
We are now ready to advance the loan. Funding a loan is a term SYNDi uses to represent the process of giving the borrowed amount to the borrower. In another term Loan Advancement. Click on the Funding button from the actions area located at the bottom right corner of the loans screen.
Click on the Process button located at the bottom right corner of the screen to proceed.
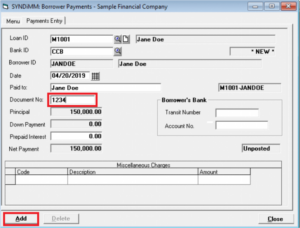
The Loan Advance requires a document number. This could be a voucher number, or cheque number. If you do not have this information, just enter 1234. Then click Add.
The loan is now funded. Next, we will need to bring the loan balance up to date. There are two sides that needs to be taken care of before the balance is up to date.
- 1. Receivables for principal, interest and mortgage insurance for which the borrower has paid in the past will need to be entered.
- 2. Receipts for the above amounts, that have been paid by the borrower will need to be entered.We can enter our receivables by running billing up to January 20th, 2020. (This is why we had changed the next billing date when the loan was setup. If you wish to record every single detail, individual monthly billings will need to be run up to the balance date.
Billing is a process of generating your receivables in your books. This process will accrue interest if the interest rate is > 0, amortize principal if it is an amortized loan, and accrue Misc Charge Receivables if there are any.
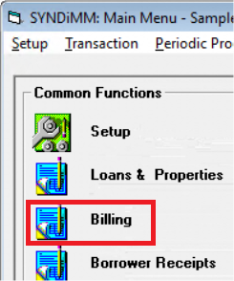
From the Main Menu go to Billing.
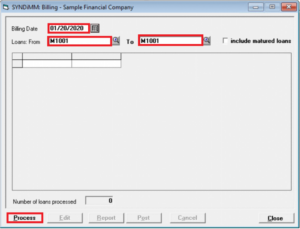
Enter the billing date as the balance date. January 20th, 2020. From Loan ID and To Loan ID with the Loan ID of the loan we are working on. Click on the Process button at the bottom corner of the screen to proceed. A message box displaying finish will be displayed once completed. Click OK to continue.
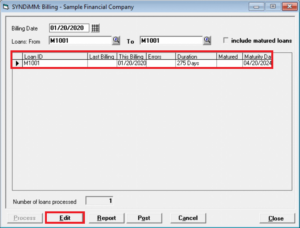
Next, we will select the billing of the loan we are working on and click on the Edit button at the bottom of the screen. Alternatively, you can double click on the billing record shown to open the edit screen.
SYNDi will automatically calculate the amortized principal and accrued interest between the start date and the next billing date. However, these amounts may not be accurate as to what the borrower has truly paid. Enter the principal, and interest that the borrower has paid up to January 20th, 2020. Then click Save.
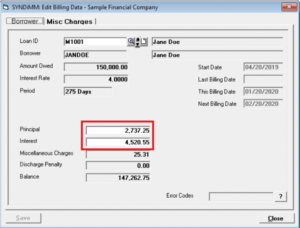
Next, click on the Misc Charges Tab at the top of the screen.
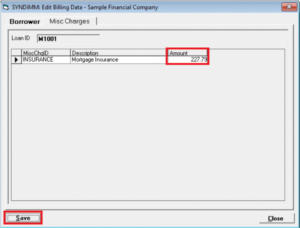
Adjust the Mortgage Insurance balance to the amount the borrower has paid up to January 20th, 2020. Then click Save.
Close the Edit Billing Data screen. You may also optionally click on the Report button to generate a Billing Report. This same report is also available in Reports and Inquiry from the Main Menu. If you are not satisfied with the numbers entered, and wish to come back to it later when you have the correct number, click on cancel to cancel this run of Billing.Click Post on the Billing screen to proceed.
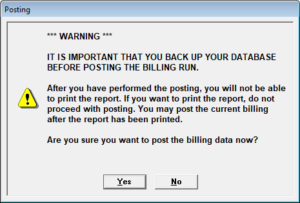
You may cancel this billing after posting through the Periodic Processing Menu from the Main Menu. However, it will leave a trail in the transaction showing that a billing was canceled.When the following warning message appears click Yes.
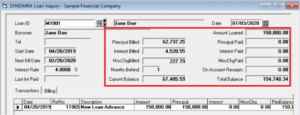
If we take a look at the Loan Inquiry screen, we will see the following receivables are ready to be paid. You can get to the loan inquiry screen by going to Main Menu > Loans & Properties > LoansEnter the Loan ID of the loan and press tab on the keyboard to loan the record. Then click on the inquiry button located at the bottom of the screen.
Next, we will enter a Borrower Receipt. This will clear the receivables bringing the balance up to date. You can get to the Borrower Receipts screen form the Receipts button located in the actions area on the loans screen, or from Borrower Receipts on the Main Menu. Going to the Borrower Receipts screen from the Loans screen will automatically set the Loan ID of the receipt to the Loan ID of the loan record you are currently on in the Loans screen.
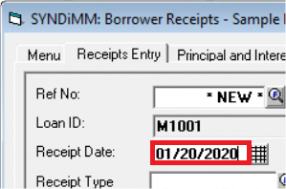
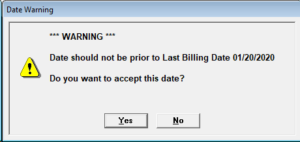
Begin entering your receipt by entering the Loan ID. If it has already been prefilled with the Loan ID you want, you may go directly to entering your Receipt Date.You may receive a warning message like the following.
Click Yes to continue.
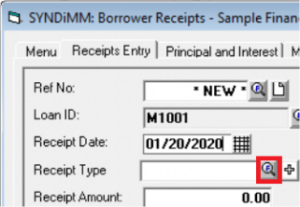
If you have receipt types defined, please select one. You can do so by going to the receipt type finder.
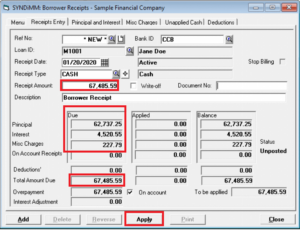
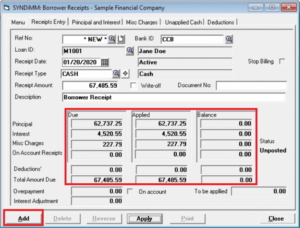
Enter the total amount of what the Borrower has paid up to January 20th, 2020. This includes Principal + Interest + Mortgage Insurance. Then click Apply.
The apply button distributes the Receipt Amount entered into the due balances. Then click Add to proceed.
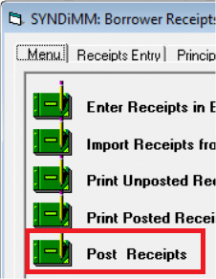
Next, click on the Menu tab at the top of the screen. Then Post Receipts.
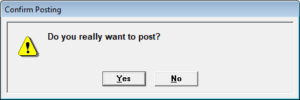
Click Yes when prompted to confirm your Post.
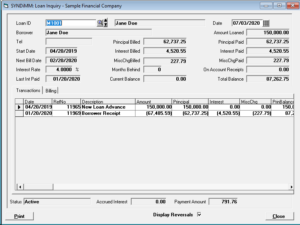
From the Loans screen go back to Loan Inquiry screen. You can see that the loan balance is now up to date as of January 20th, 2020.

