Getting started: a tour of the SYNDi Online main screen #
This guide introduces the SYNDi Online main screen and explains the purpose of every menu
and tool. By the end, you will be able to confidently find your way to any feature. No
accounting or technical experience is required.
1. Signing in and where you begin #
When you sign in, SYNDi Online returns you to the last screen and company you were working
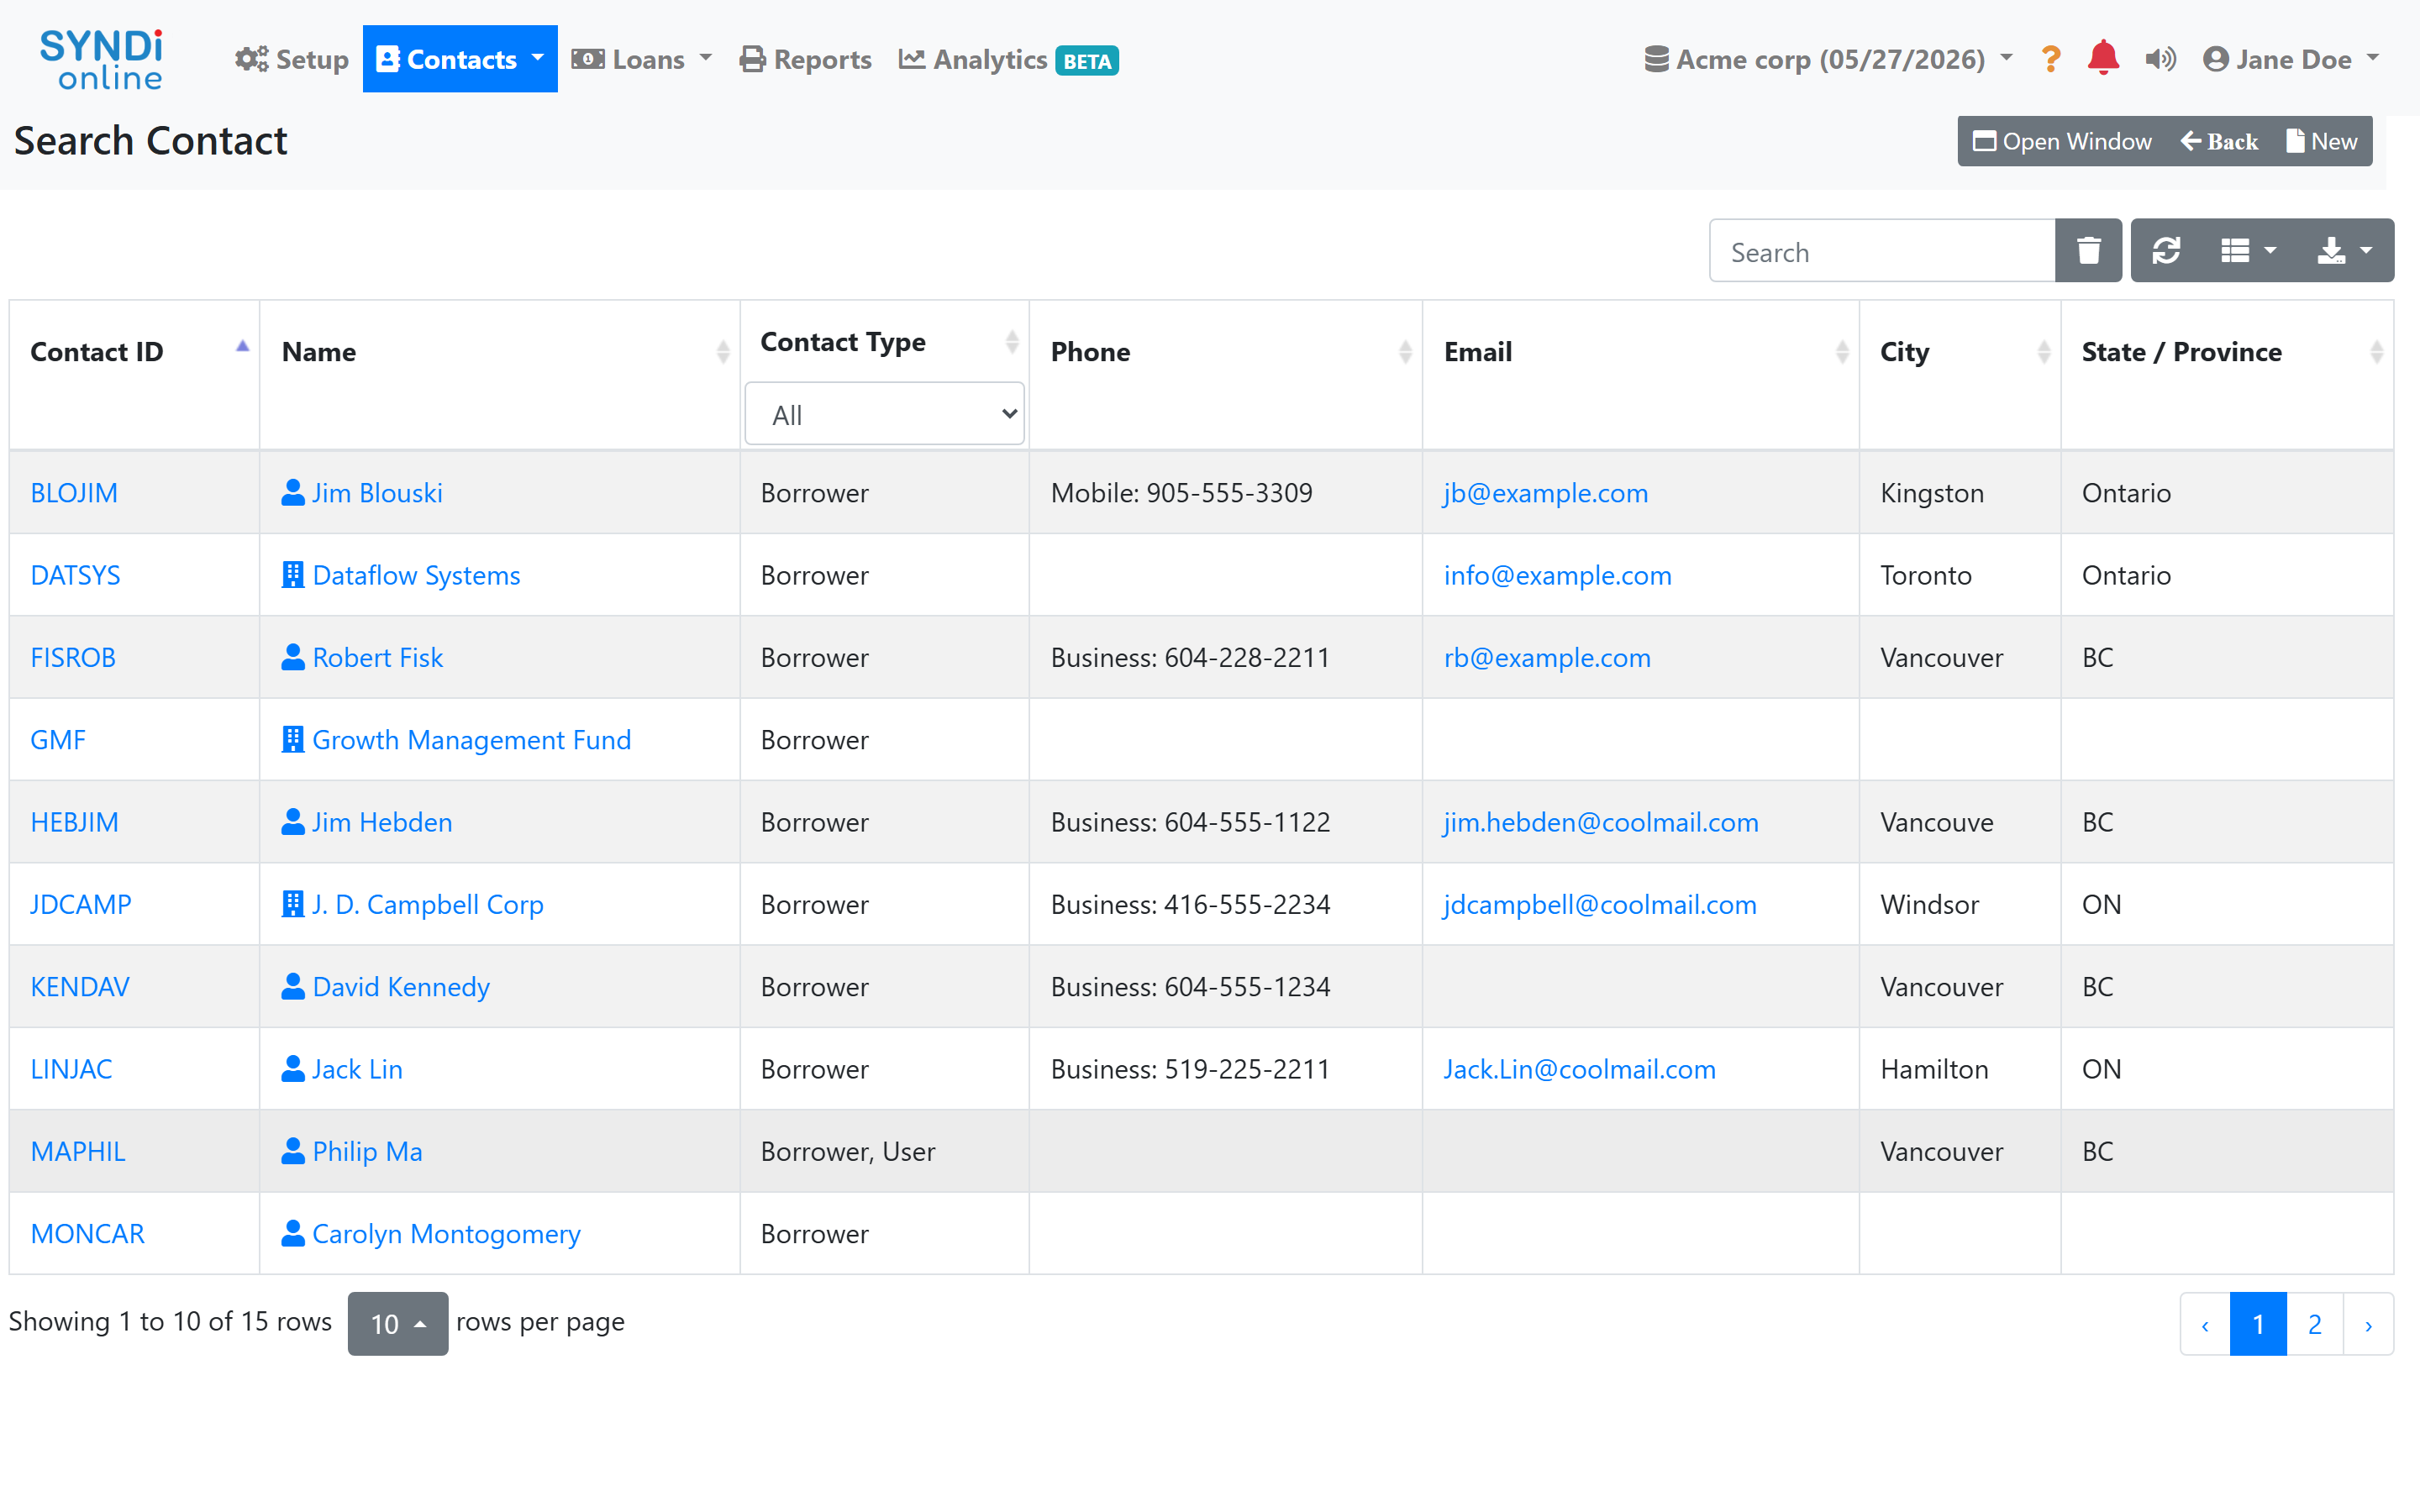
in, so you can pick up exactly where you left off. The first time you sign in, you begin on
the Search Contacts screen, which lists the people and businesses set up in
your company.
2. The navigation bar #
Every feature in SYNDi Online is reached from the navigation bar along the
top of the screen. It remains visible on every screen. Menus are grouped on the left, and
your company and account tools are on the right.

3. The main menus #
The left side of the navigation bar contains the menus you will use most often:
- Setup – your company settings, such as company details, accounting
options, and loan and contact preferences. You will typically configure these once when
starting out, then revisit them only occasionally. - Contacts – the people and businesses you work with, such as borrowers
and co-signers. - Loans – where you create loans and record day-to-day activity such as
billing and receipts. - Reports – printable statements, listings, and summaries.
- Analytics (BETA) – charts and dashboards summarizing your
portfolio. This is a newer feature and is still being refined.
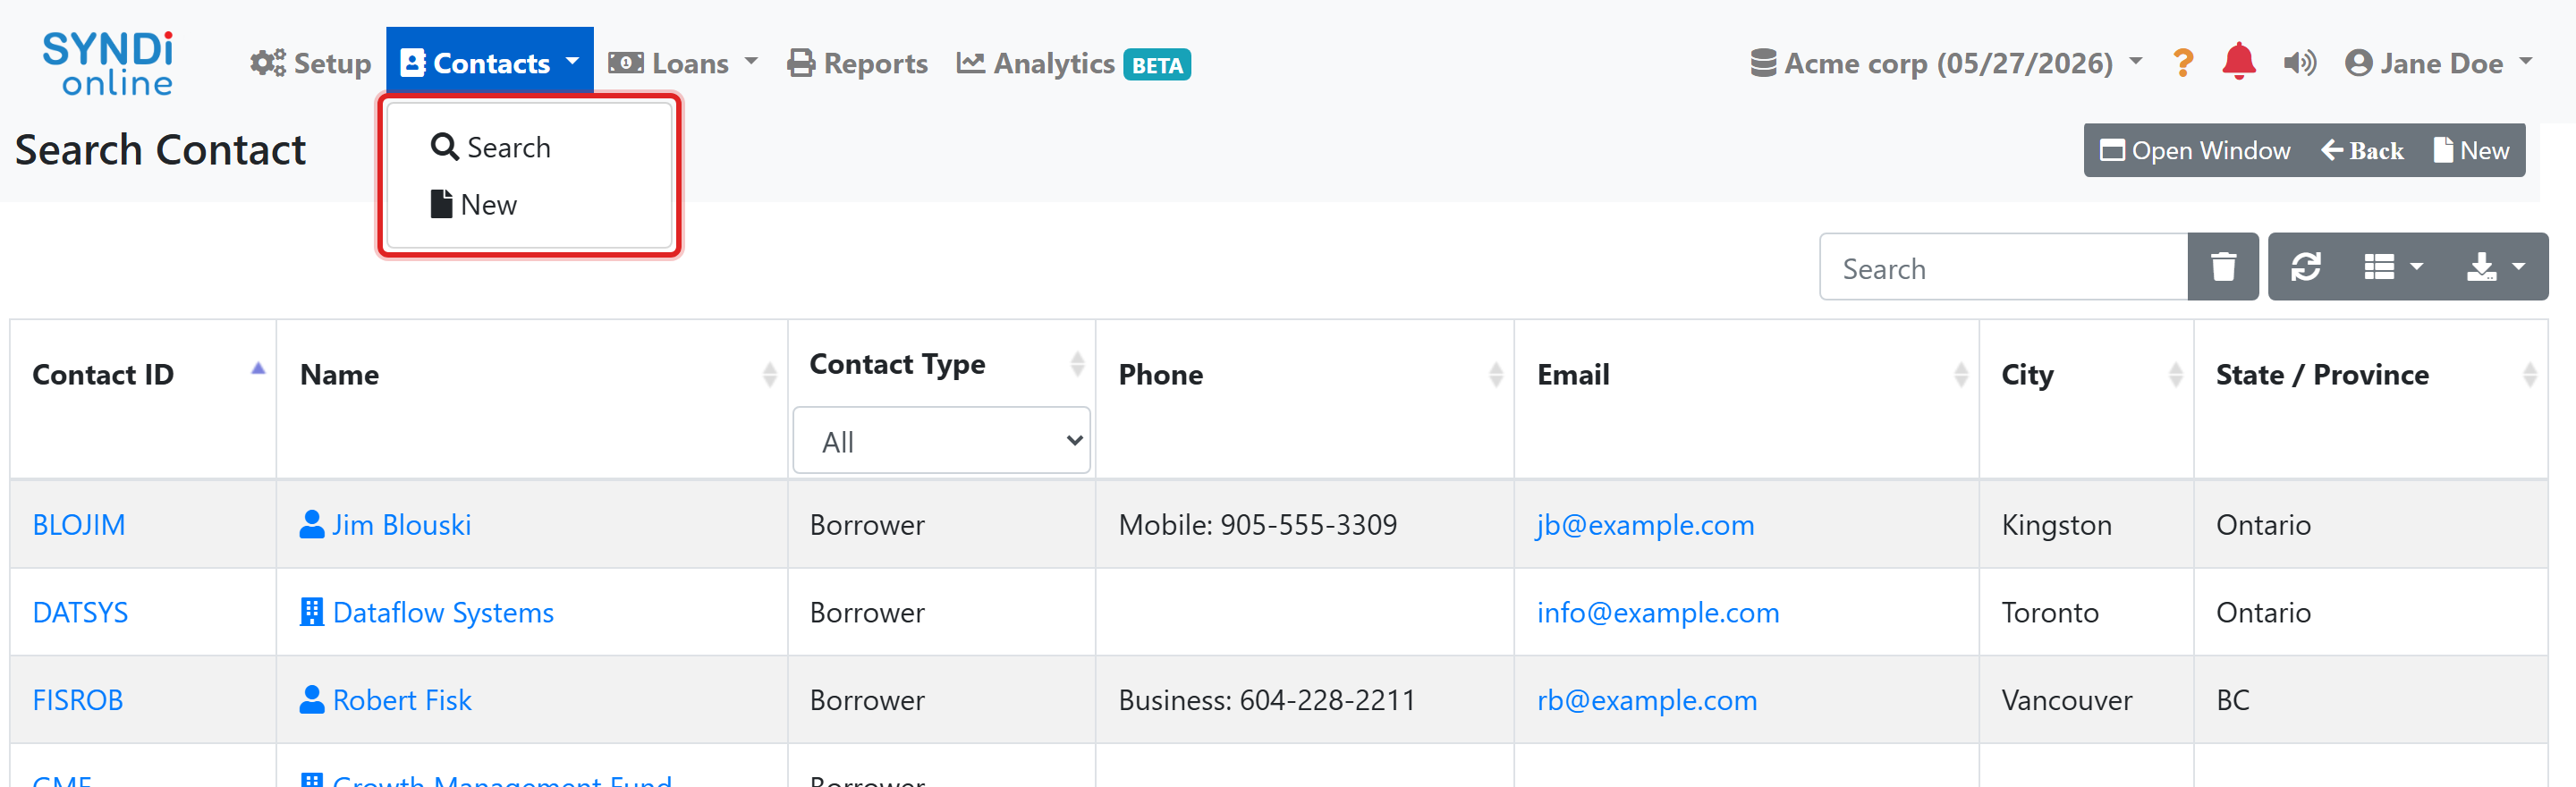
A small arrow beside a menu name indicates that it opens a list of choices. For example,
the Contacts menu offers Search to find an existing
contact and New to add one.
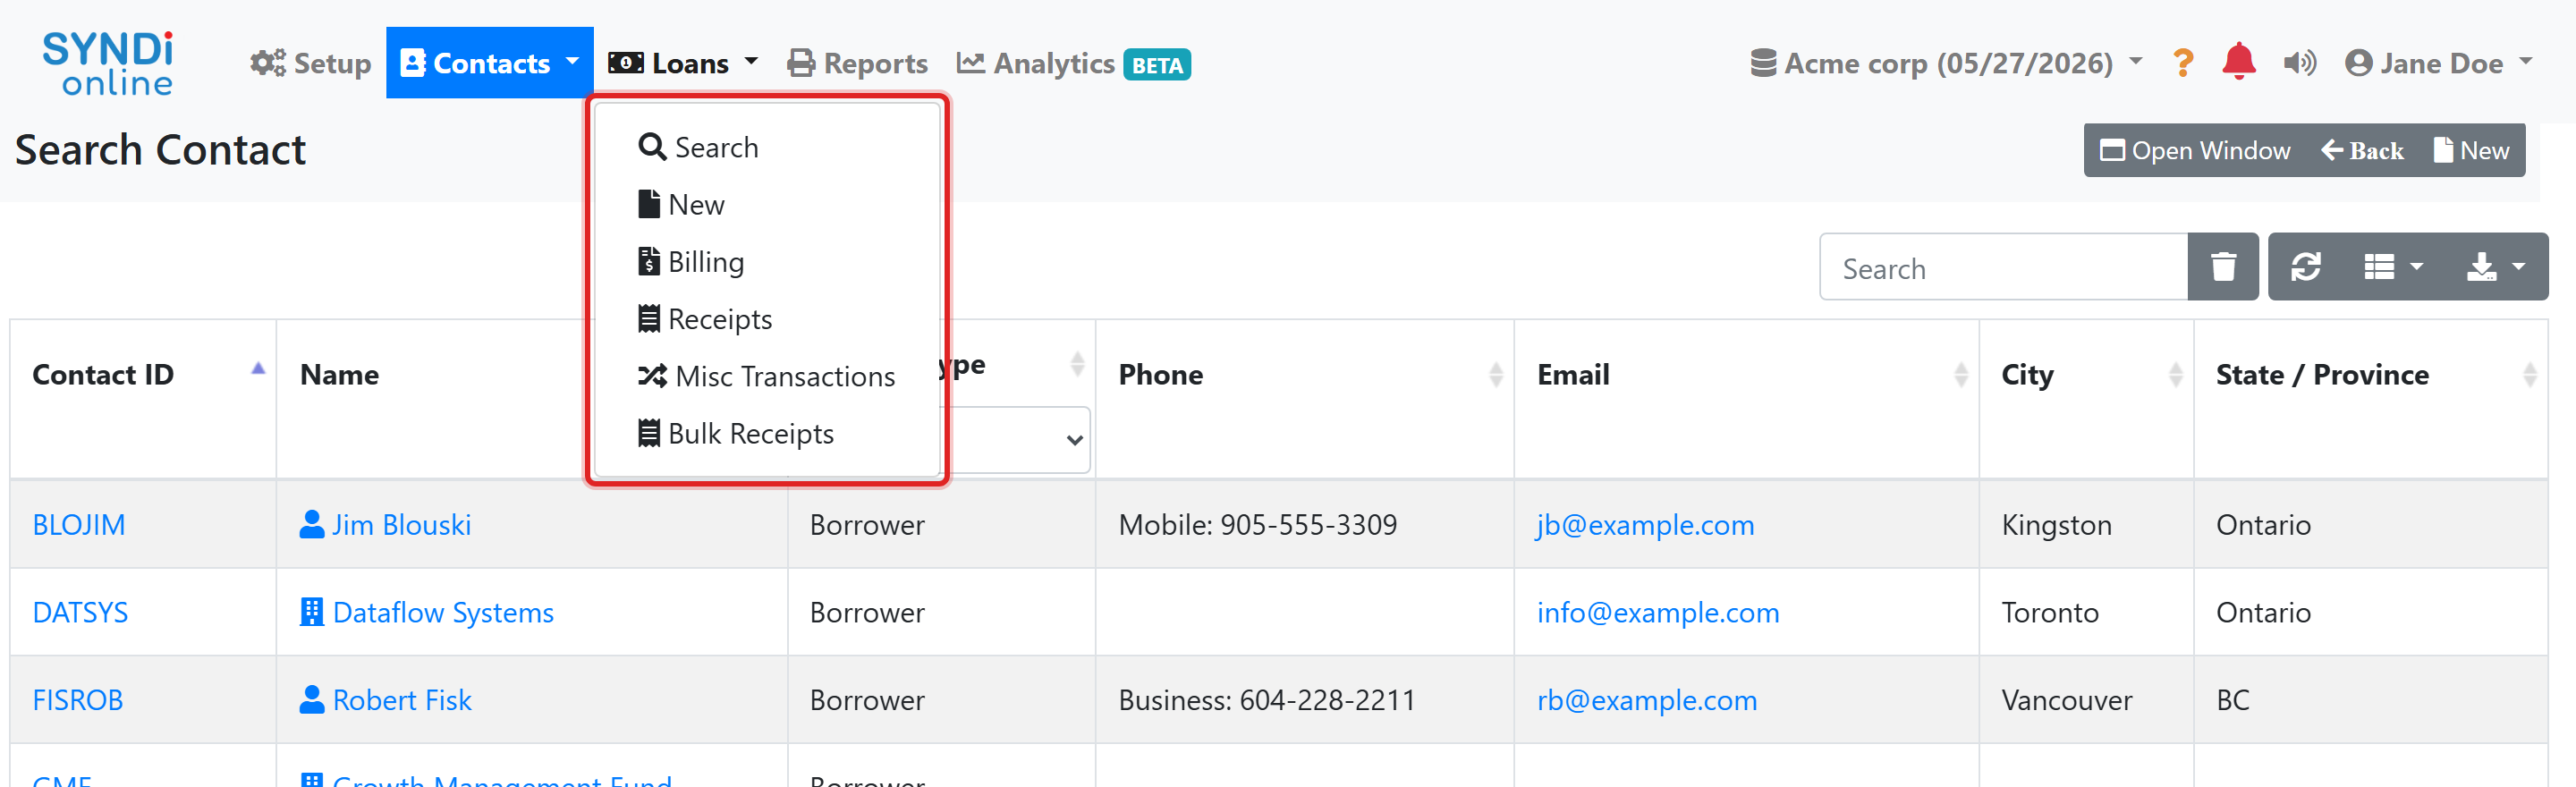
The Loans menu is the one you will use most. From here you can search
loans, create a new loan, run Billing, record Receipts
(payments received from borrowers), and more.
Online displays only the features your company has enabled, so you may see additional menus
(such as Security Deposits or Inventory) or fewer than shown here.
4. Switching between companies #
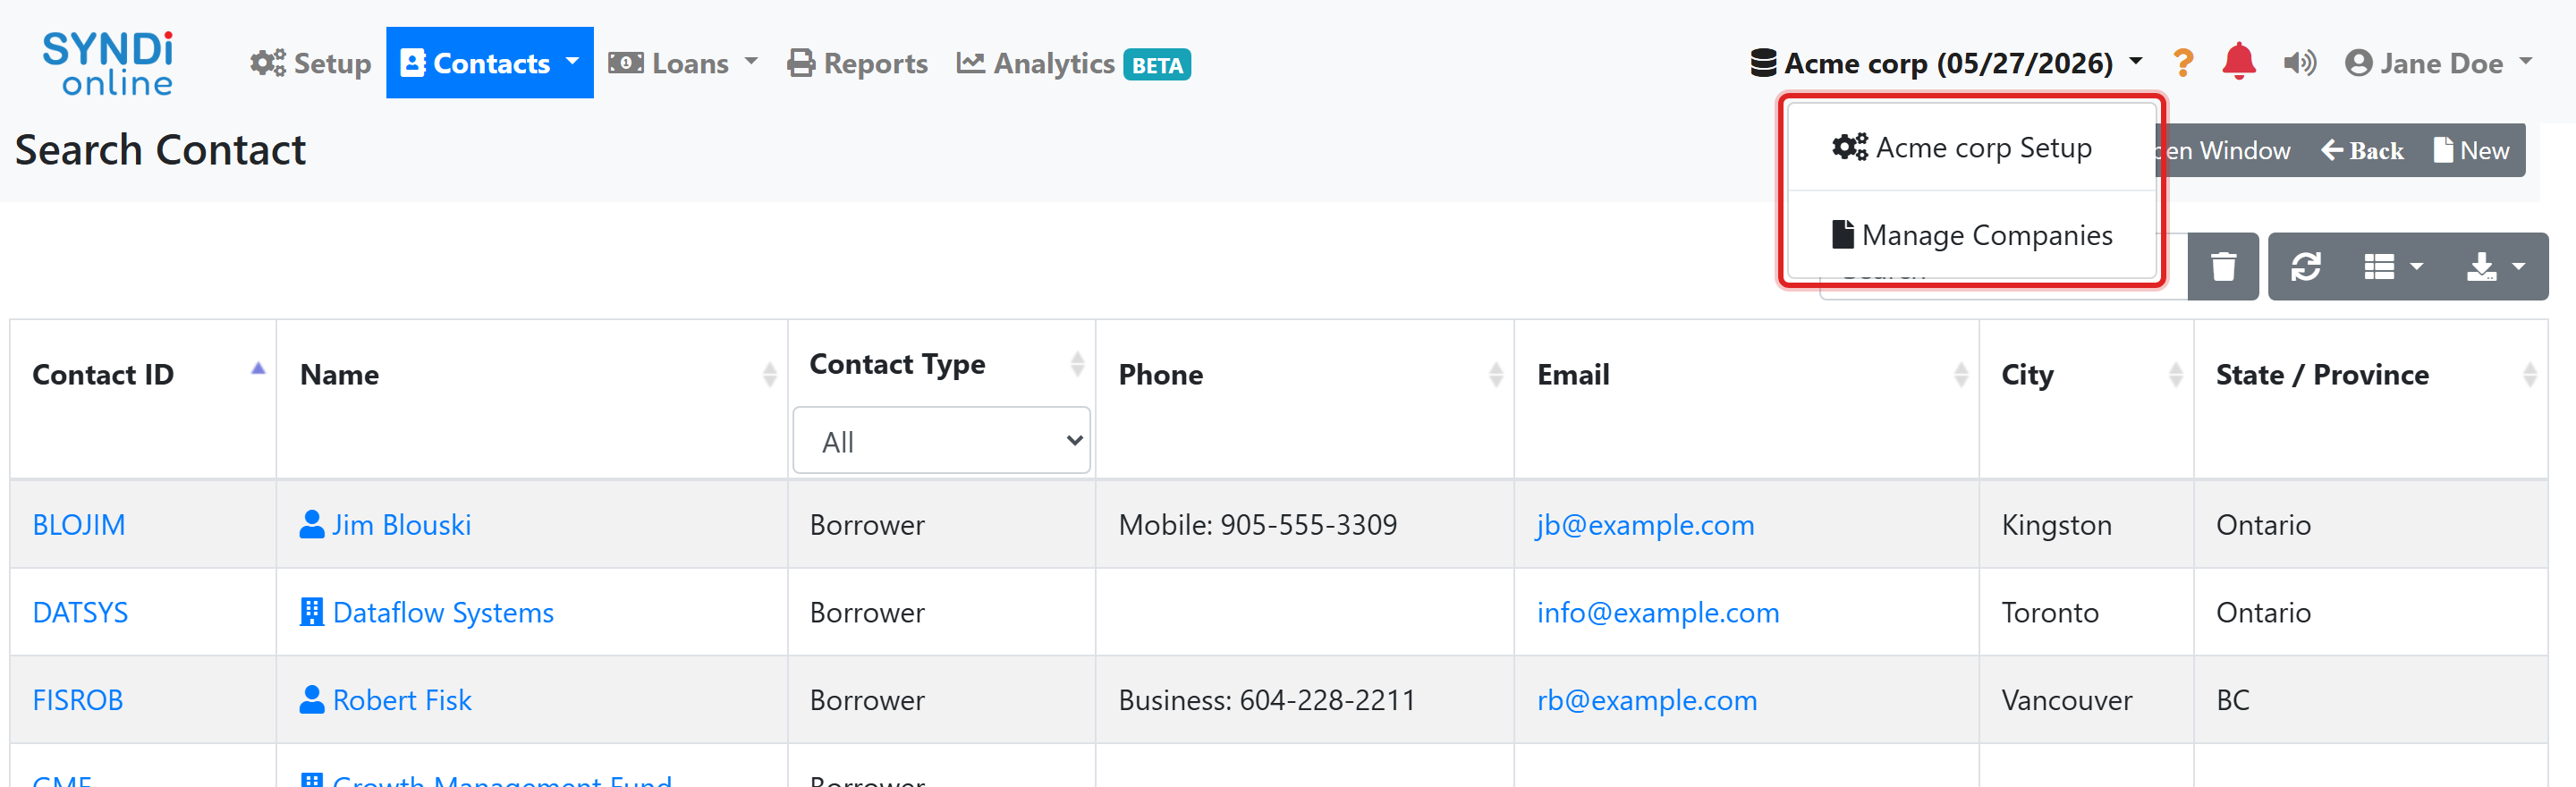
The company name and current date appear near the top right of the navigation bar (for
example, “Acme corp”). If you have access to more than one company, click this area to open
the company menu. From here you can open the current company’s Setup,
choose Manage Companies, or select another company to switch to.
Each company’s information is kept completely separate. Switching companies changes every
screen, list, and report to show only that company’s data.
5. Help, notifications, and sound #
To the right of the company name you will find three quick tools:
- Help (the orange question mark) – opens guidance for the screen you are
currently viewing. - Notifications (the bell) – displays reminders and alerts.
- Sound (the speaker) – mutes or unmutes the notification sound.
question mark to open help for that exact screen.
6. Your account and profile #
Your name appears at the far right of the navigation bar. Click it to open your account
menu, where you can open My Settings or Sign Out.
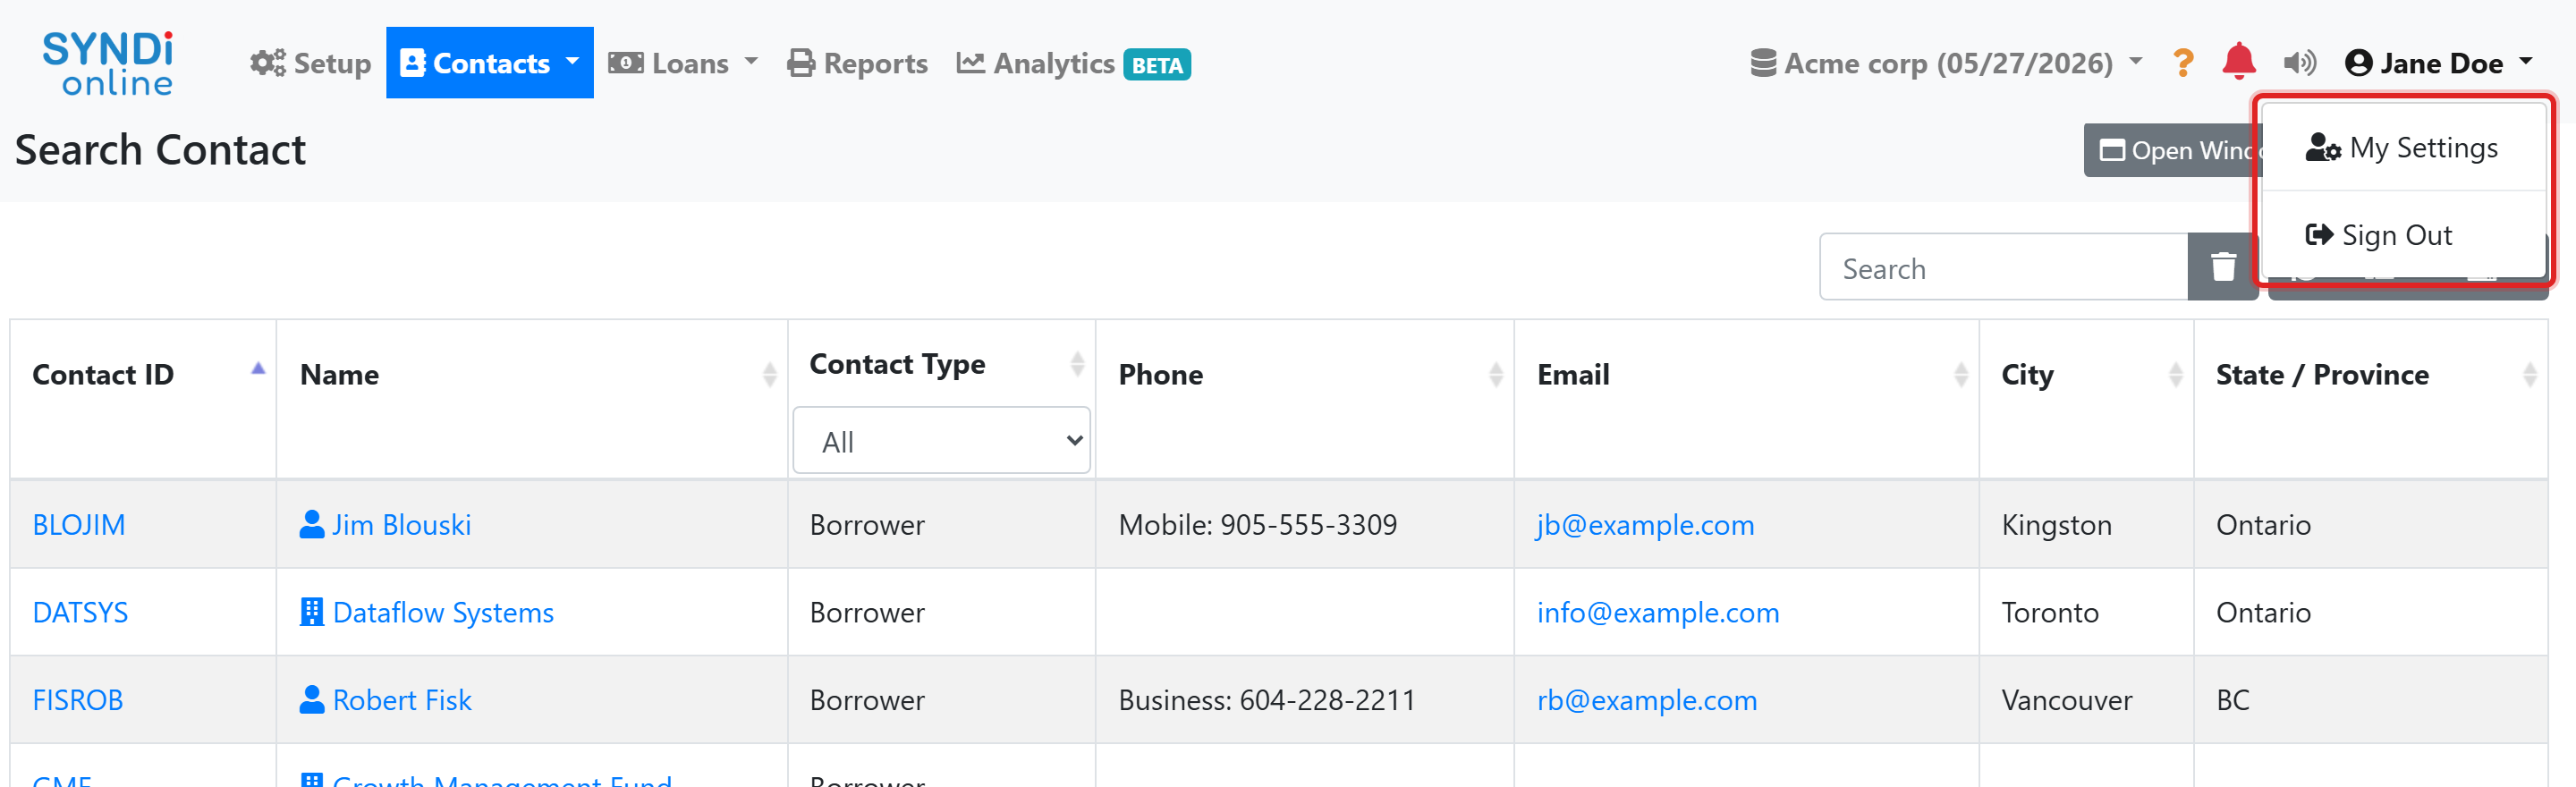
Selecting My Settings opens your User Profile. Here you can
update your first and last name, change your password, and manage security options such as
two-factor authentication and passkeys. Your email address is shown for reference and is used
to sign in.
Frequently asked questions #
Why do I not start on a home or dashboard page?
SYNDi Online returns you to the screen you used last so you can continue your work
immediately. The first time you sign in, that screen is Search Contacts.
A menu shown in this guide does not appear for me.
That feature is likely not enabled for your company. An administrator can enable it under
Setup.
How do I switch to a different company?
Click the company name near the top right and select the company you want. Each company’s
data remains entirely separate.
Summary and next steps #
You now know how to navigate the SYNDi Online main screen. The recommended order for getting started is:
- Add a contact (your borrower)
- Create a loan
- Record a billing
- Record a borrower receipt
- Generate a borrower statement
Each step has its own short tutorial in this knowledge base.